
Continuing the Cabinet projection effort from the last post let’s see if we can close out issue #1 on github. We need to add sides and make sure things look good under different circumstances.
We aren’t far from finishing #1 now! Before I wrap up those cube sides, let’s make some additional sample grids. These will give us some more practical things to look at and verify the work.
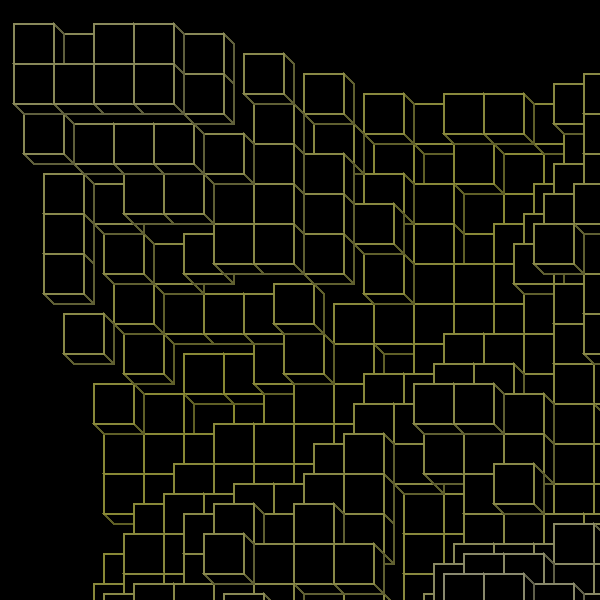
A simple testbed of stairs with differing colors. See commits #7b67378c and #116896fa for where these are added. Done with a -5, -5 offset here.
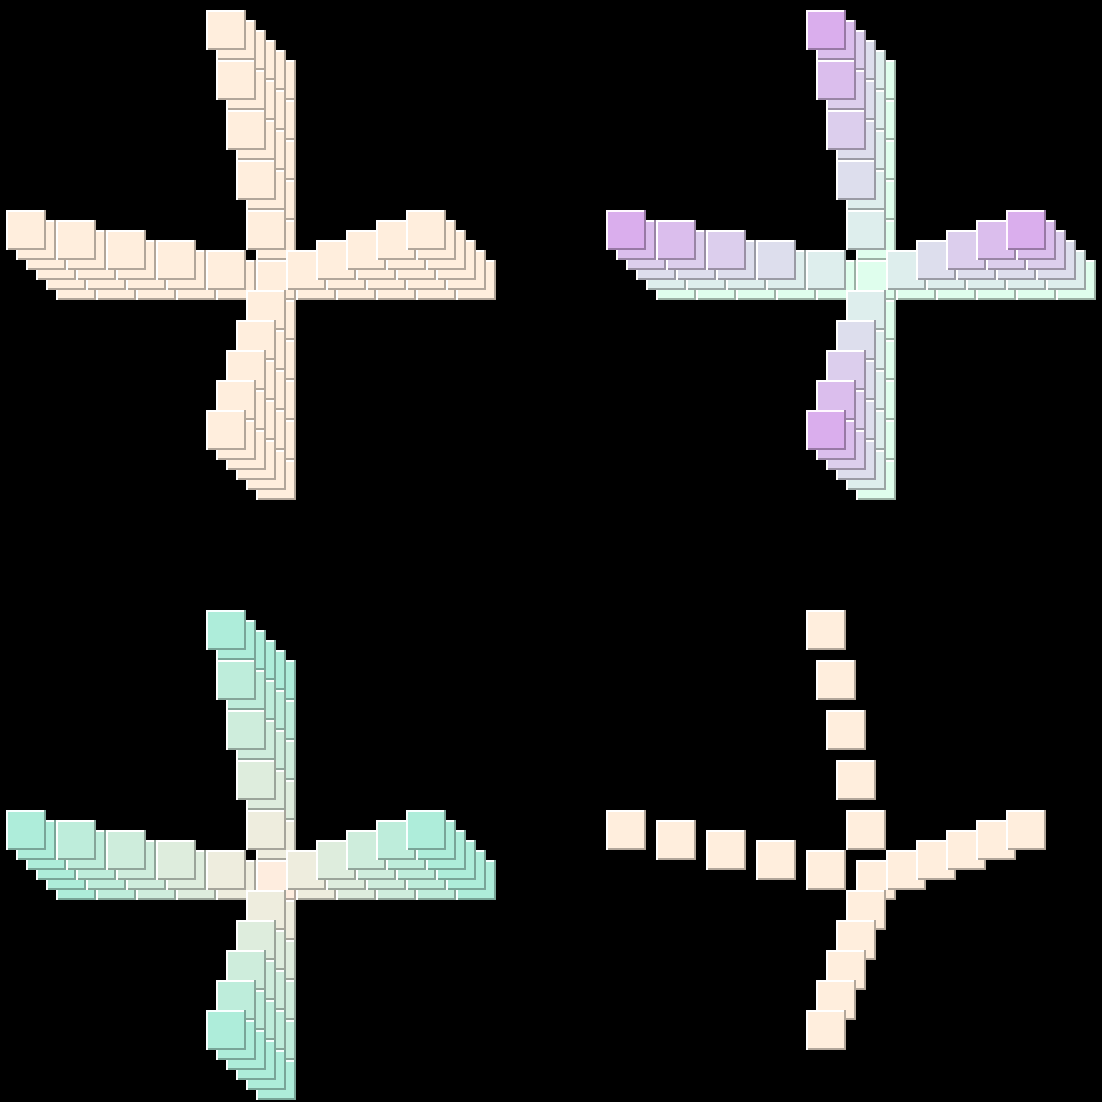

Stairs are fine, but where’s the math? See commit #5c72fcf3. Just a simple sin() plot and a hyperbola.

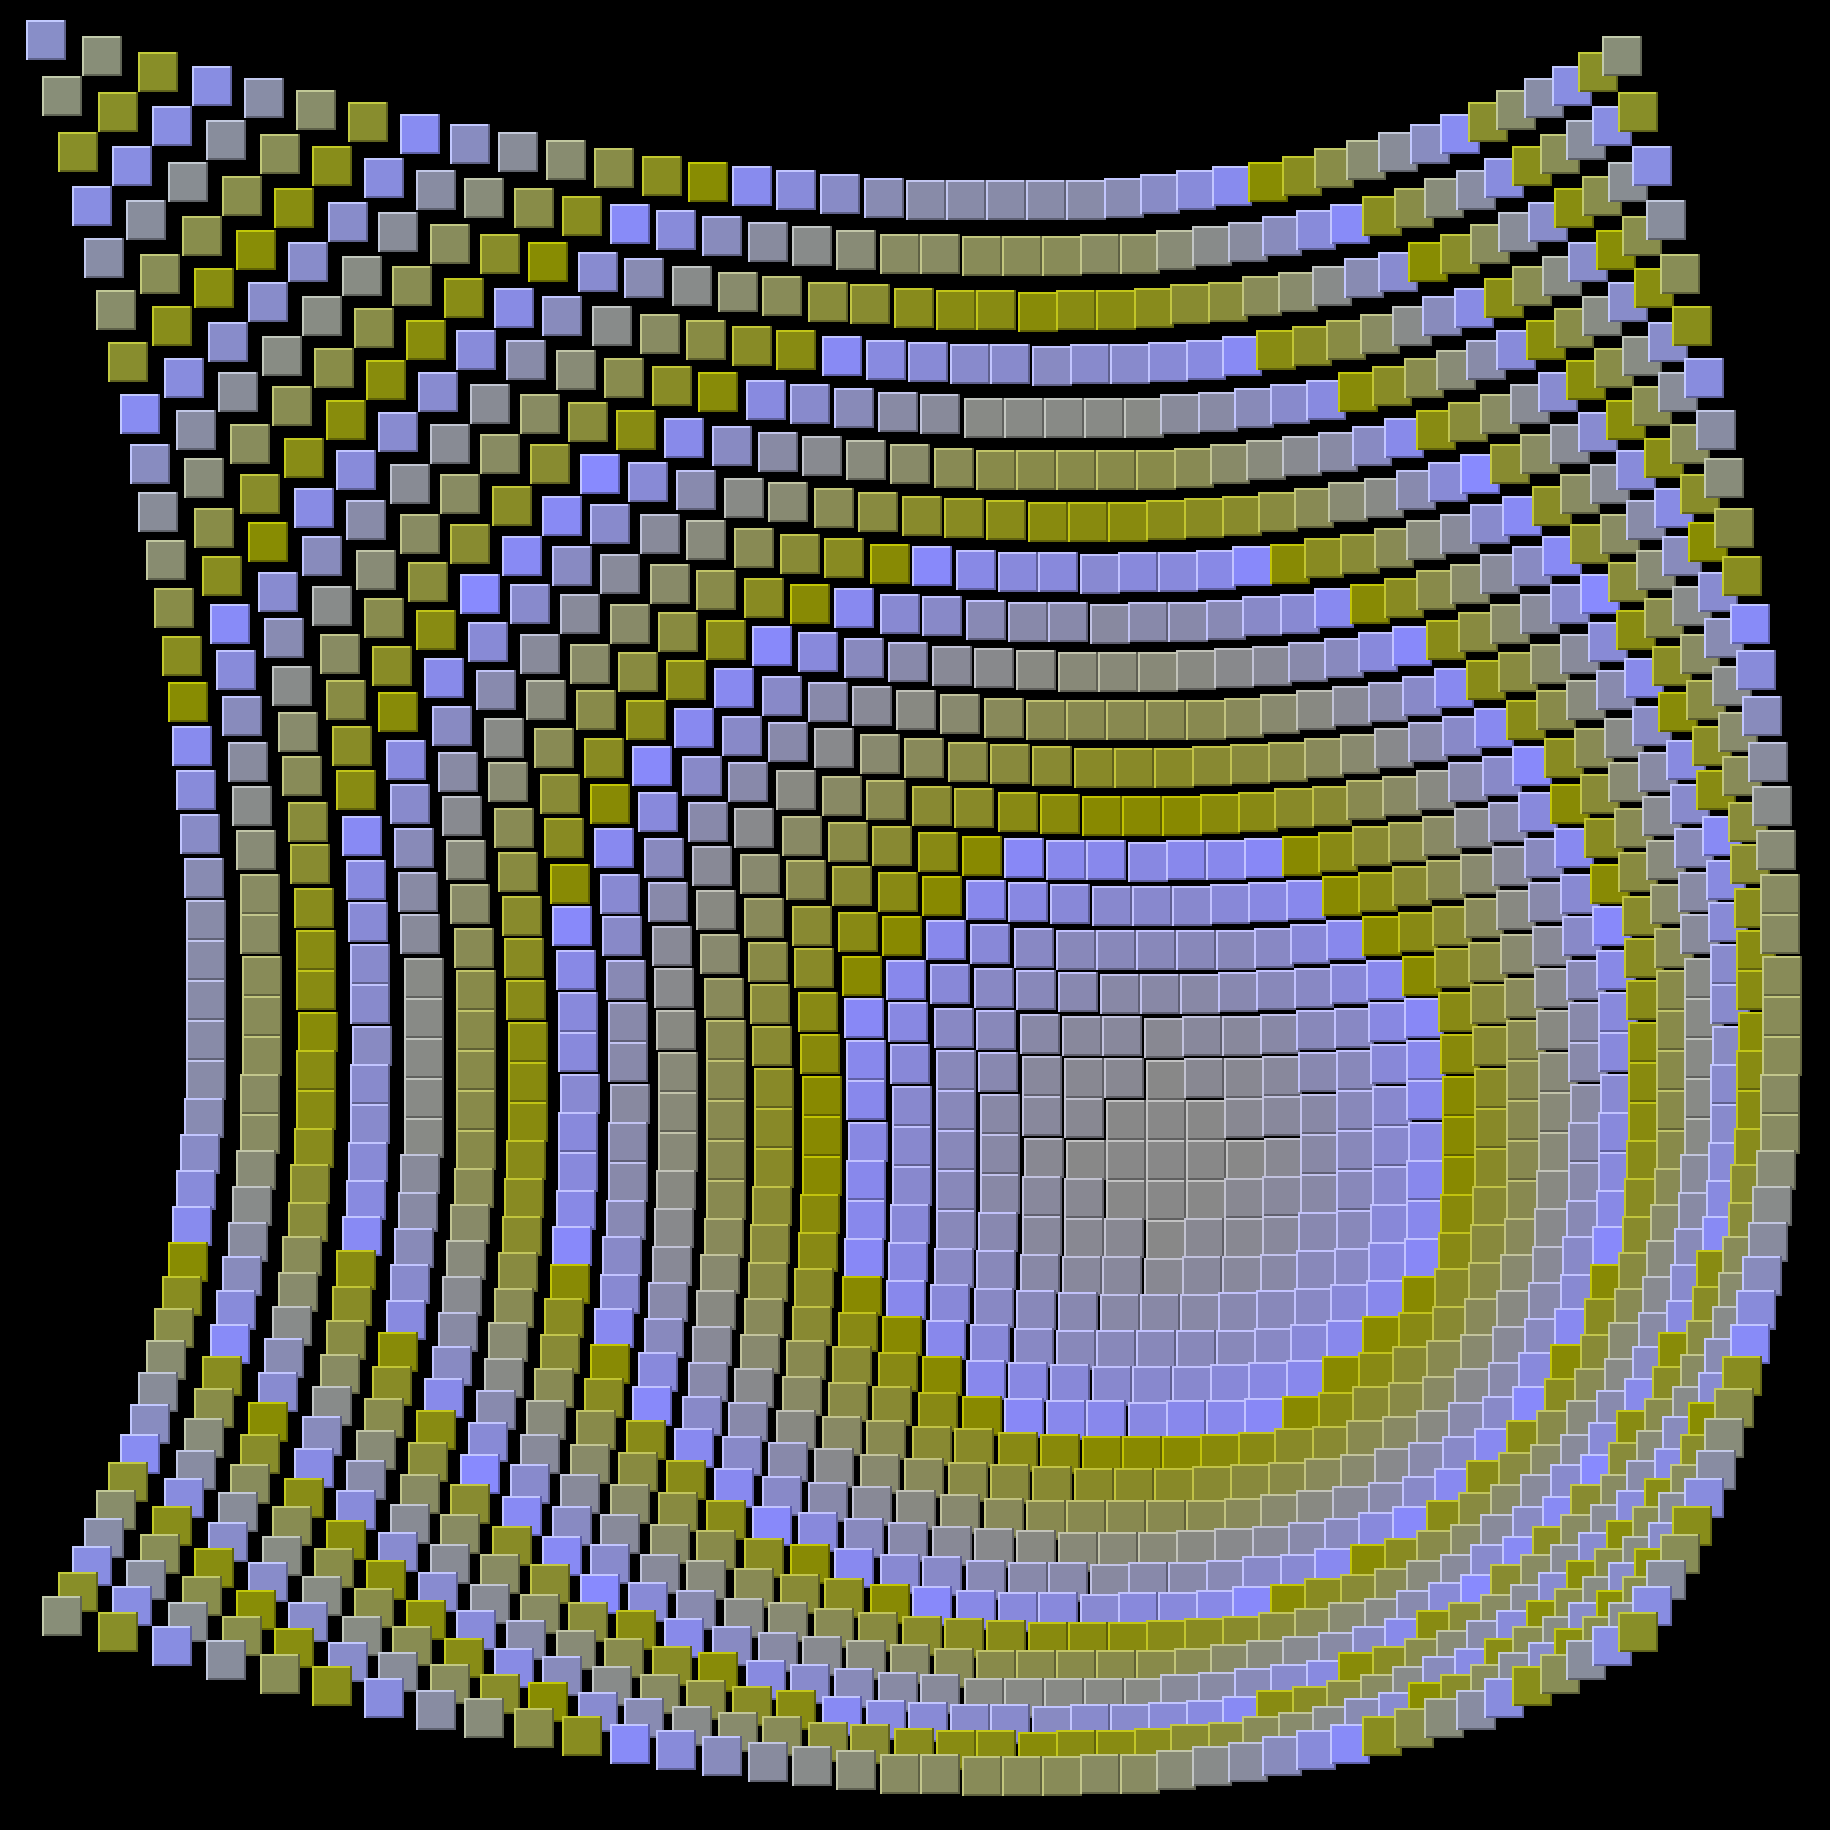
Wow, I love how curvy that sin plot is, just so nice. The circle rendering (also used in the image header up top) just makes it feel so organic.
All these grids (twelve of them, now) are in SampleGrids but some patterns and utilities are starting to emerge from that class. Concepts like loading different kinds of files, drawing lines, doing iterative work all should be cleaned up and made available as utilities. I filed issue #9 for this.
Sample data is cool and all, but that’s not the big reason why we’re here. We need some sides! In the last version of RenderType had me calculating all this, but I was simply drawing three lines there, lacking the rest of the visuals. Worse, I only bothered to finish line drawing for the down-and-right case.
My realization on how to do this came by writing this comment before I started coding the final version:
// The sides of the cube are described by a filled six-sided polygon with points // 1, 2, and 3 at the edge of the square and 4, 5, 6 offset by hDepth, vDepth // The first three points are based on which direction we indicate height. |
In other words, this shape:

AWT has a polygon construct that matches exactly what I need, so I rewrote the code to use that, and fleshed out all four directional cases. Here’s the before and after for one of the cases. In each case I started on the square’s face, and went in a clockwise order.
// Just draws lines // From bottom-left: g.drawLine(r.left, bottom, r.left + r.hDepth, bottom + r.vDepth); // From bottom-right: g.drawLine(right , bottom, right + r.hDepth, bottom + r.vDepth); // From top-right g.drawLine(right, r.top, right + r.hDepth, r.top + r.vDepth); |
// Does sides! // Height indicated by drawing below-right the face. polygon.addPoint(r.left, bottom); polygon.addPoint(right, bottom); polygon.addPoint(right, r.top); int outRight = right + r.hDepth; int outBottom = bottom + r.vDepth; polygon.addPoint(outRight, r.top + r.vDepth); polygon.addPoint(outRight, outBottom); polygon.addPoint(r.left + r.hDepth, outBottom); |
I could probably refactor that since it and the other three cases look so similar, but I think it’d end up being a six-int-parameter monstrosity, so I left them separate.
Once I have the polygon populated, I could draw with the handy Graphics.fillPolygon() method to do the dirty work for me. I really wasn’t wanting to do my own flood fill or draw a bunch of lines, etc. The last piece is to draw a line from the second to the fifth points representing the cube edge.
Here’s how it turned out. Before on the left, after on the right.

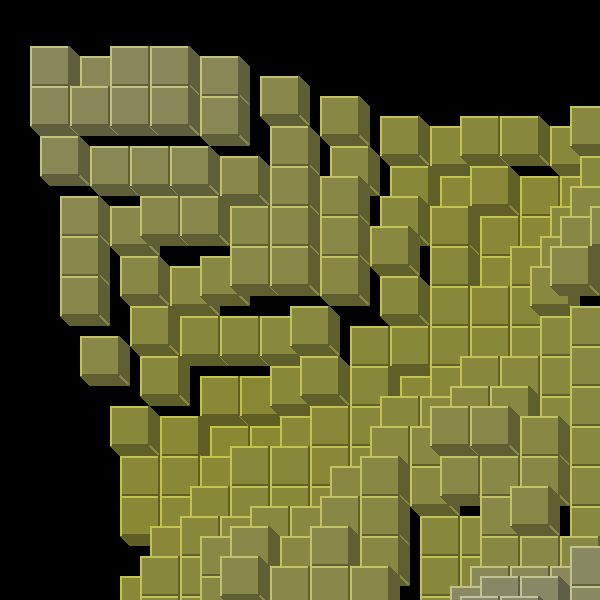
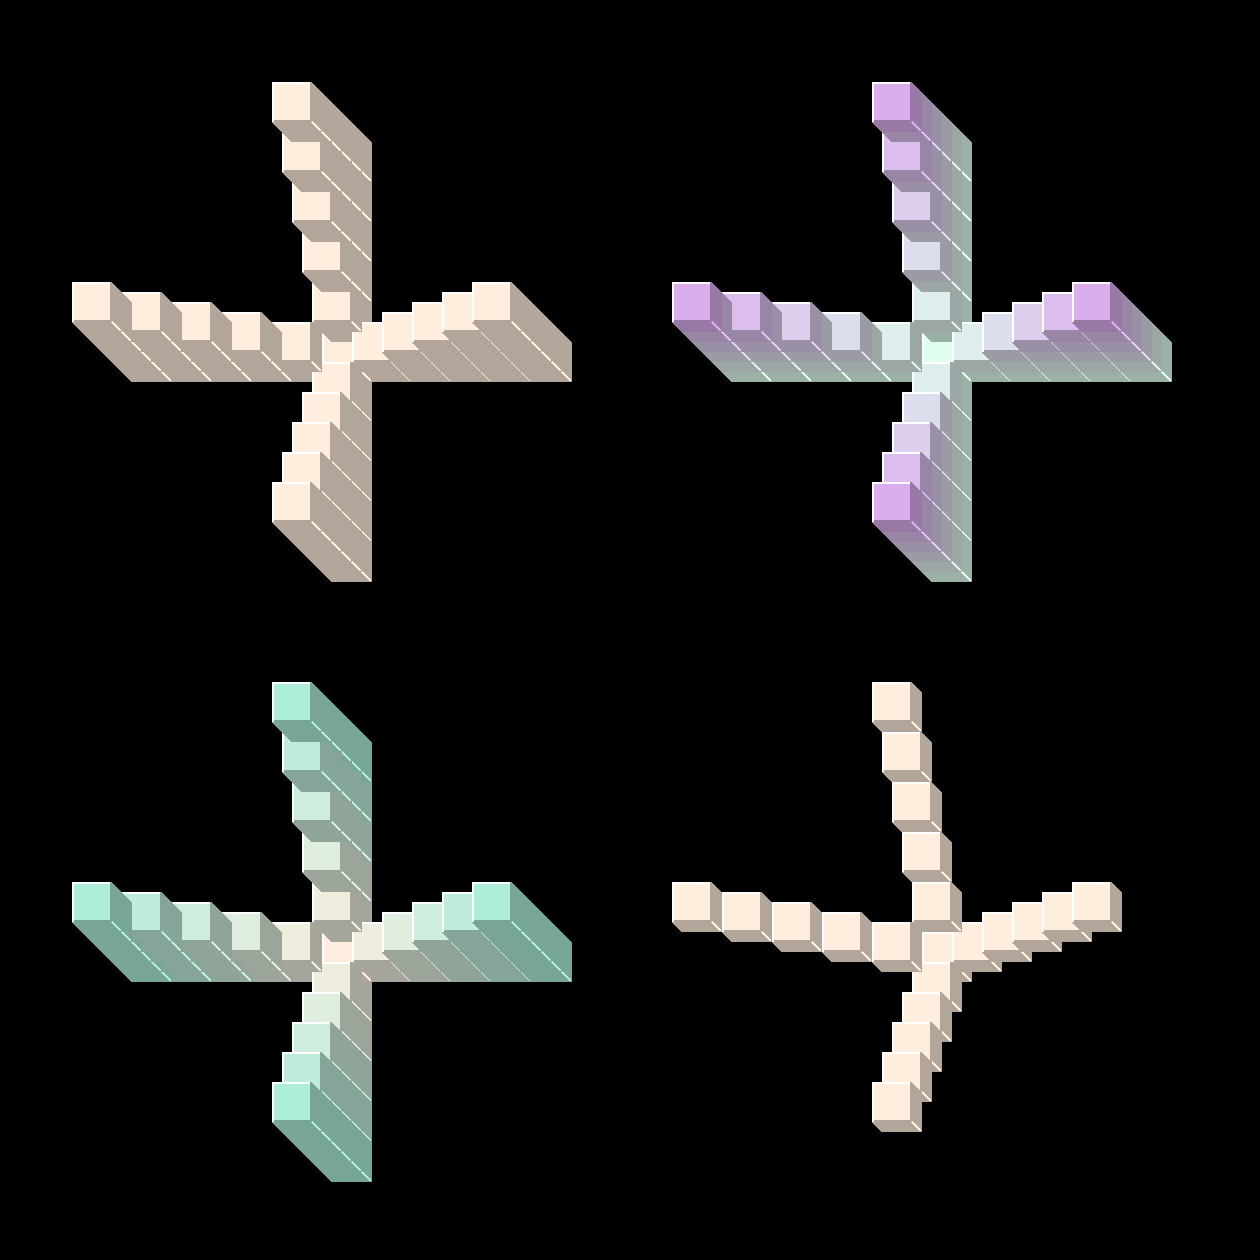
Not too bad, right? I was pleased. I realized I could do several very similar render types based on this, so I made a wireframe and a “solid” wireframe too. The latter is a bit tricky; I actually draw a black version of the sides, then I draw the wireframe on top of this. Definitely slower with two passes, but still pleasing.
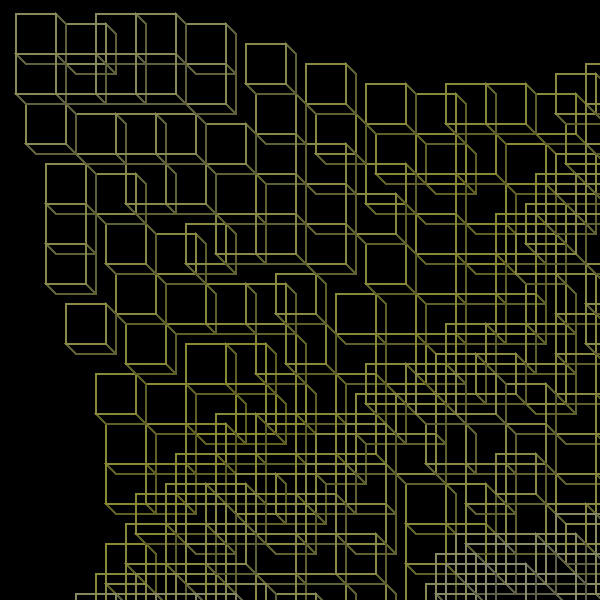
Note, however, that the “chaos” I mentioned in the last post is still there. It’s not quite as bad, but any more than 1 or 2 difference in Z looks really rough, as you can see towards the bottom right. What can we do? We can’t necessarily just increase side lengths leaving z offsets the same distance — if we do that then we’ll start drawing squares into others unintentionally. It’s possible it’s just a matter the data set used for the Grid. If you want it to look a certain way you’ll just have to massage placement of voxels. I’m not particularly happy with that answer though, so we’ll keep looking at it in future articles.
Circling back, let’s see those stairs again. They look pretty good, but not without issues:
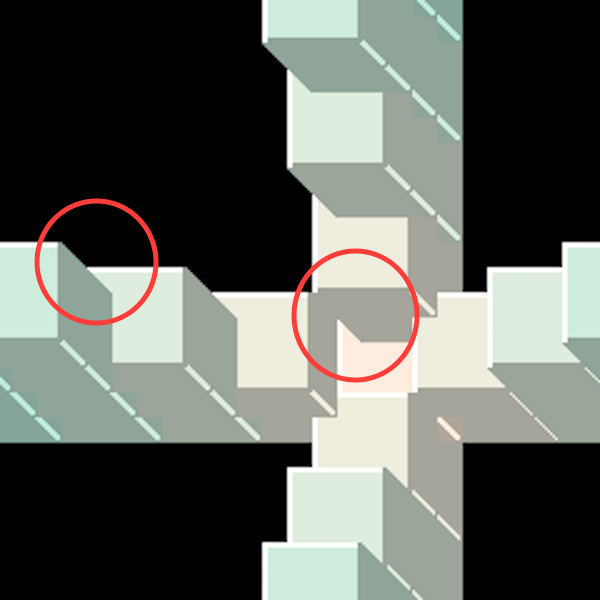
A couple of rendering issues visible there. The left-hand one, for some reason, doesn’t show up on the single stairs (beige, bottom right), so it must be related to rendering under another voxel. The issue on the center is also worse on the deeper stairs. I think this is mostly an issue with voxel ordering. We sort only by Z right now, but rendering in this case assumes we’re drawing from top left to bottom right (so that other tops overlay sides). We can do some better sorting, but we also shouldn’t even draw a side when there’s a neighbor there. Maybe we can address these when we get to issue #5.
Next up:Â Let’s get a little perspective!
You can find all the code changes related to this article in pull #8.
Pingback: Wannabe: Gaining some perspective | MuddyHorse Farm and Tech